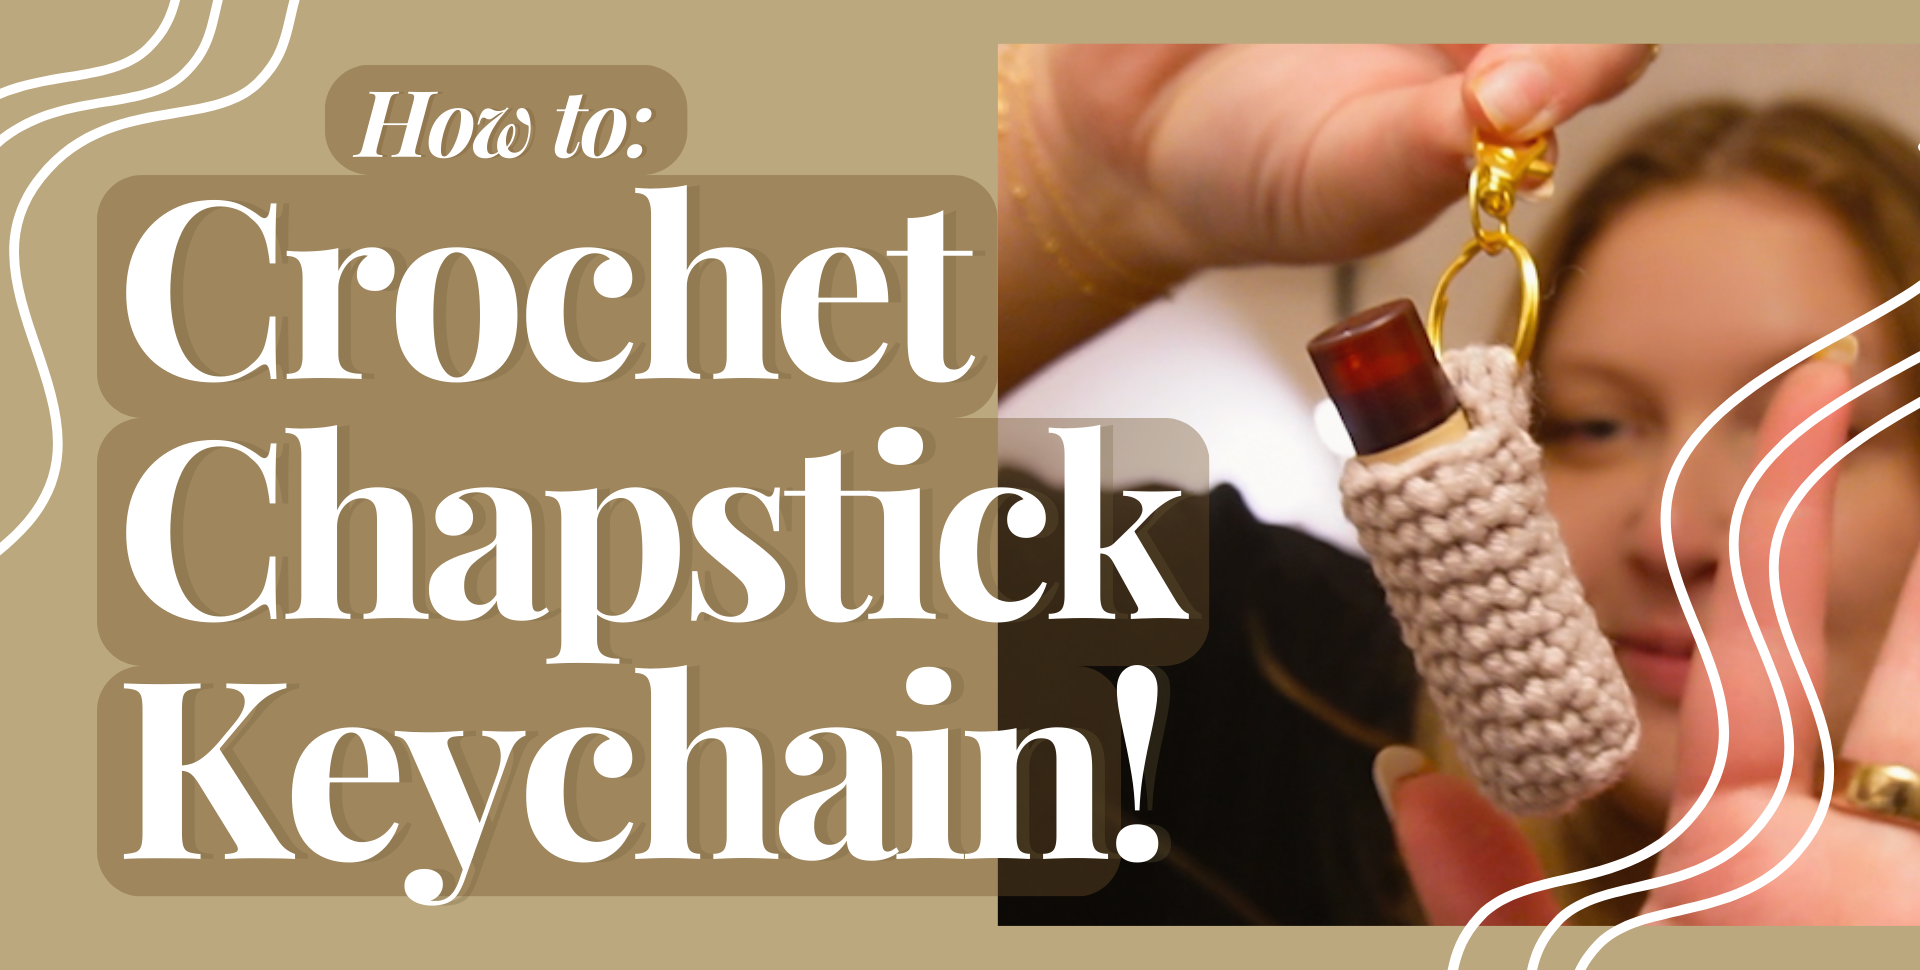
How to Crochet a Chapstick Holder Keychain: FREE pattern & Tutorial
Before Getting Started...
If you have not already checked out the video that goes along with this pattern, you should head over to my Youtube video (link above) to crochet along with me! As a visual learner myself, I always appreciate a video tutorial and a written pattern when it comes to making crochet projects. If you are anything like me in that way, or if you are a beginner at crocheting, you may want to reference the video for a visual pov too!
If you have never read a crochet pattern before, some of the abbreviations and/or crochet “slang” that is typically used can be hard to grasp at first! I was completely surprised when I bought my first crochet pattern because I did not realize that patterns are written in a very particular way. Since I do not have a ton of experience in pattern writing yet myself, I tried to keep these directions as simple and as clear as possible. Just reference the key if you ever come across an abbreviation you are not sure of.
Also, should you have trouble following along at all, feel free to reach out to me as I’d be happy to help you along or make edits to the directions if something is unclear!
If you make a crochet chapstick holder keychain you should totally show off your work by posting it to social media! When you do, be sure to tag @madefromstratt so I can see your creations and applaud your hard work.
What Type of Yarn to Use:
There are a few things to consider when it comes to choosing the type of yarn to use for this project. First, think about the stretch factor over time. When you use your key chain holder, you will be taking a lip balm in and out of it more than likely quite a few times a day. Depending on the yarn you use, the holder could stretch out a bit over time.
However, if you choose a yarn that is less likely to stretch, you’ll be golden! Yarns made of 100% cotton are probably the way to go here. In the video I am simply using a worsted weight yarn from my stash and have seen success with those as well!
Another thing to be wary of is in the same realm of longevity. One of the very first lip balm keychains I made I used Red Heart’s super saver yarn in black. I definitely used the wrong size hook for that project too but for a while it looked really good! After about a year though, the acrylic yarn does not look good anymore. It has been pilling for a while and has become very frayed on the outside. It looks almost unrecognizable to what it started off as.
Even though it isn’t really pretty anymore, it is still functioning! I had put it on my work lanyard so that was another reason why it got so beat up and it looks the way it does.
I share all of this with you because, looking back, I wish I would have chosen a cotton yarn or a yarn that wouldn't have tattered so easily.
I also learned to use a smaller hook size to keep all the stitches more compact. This way, there is less of a chance for snags to happen which protects the longevity of the keychain as well.
Without further adieu, let’s make a crochet chap stick holder key chain....
What You Need to Make This :
1. Crochet hook (size depends on the type of yarn you are using- I recommend a 3.4-4mm)
2. Yarn (see important notes on this above!)
3. Stitch Marker
4. Key chain ring and clip
5. Yarn needle
6. Scissors
7. Chap stick!
Abbreviations Key:
Inc- Increase
St- Stitch
Sts- Stitches
Sc- single crochet
Dec- Decrease
Ch- Chain
Crochet Chapstick Holder Keychain Pattern:
Step 1:
Create a magic circle (also called a magic ring) with your yarn.
Crochet 6 sts in the magic ring and pull tightly on the end to join the ring together (6 sts- should be a small circle)
Step 2:
Then, make an inc in each st until you have 12 sts. Mark the last stitch you created with the stitch marker. You need to know where each row ends so you can keep the same amount of stitches each time. (12 sts)
Once you have a 12 stitch circle, you may want to hold your chap stick up to it to make sure the base of the holder we just created will not be too big or too small for it to fit inside snugly.
Step 3:
Crocheting into the back loop only, sc into each stitch. Remove the stitch marker on st #12 and complete the last st of the round. Then mark the last st you just made with the stitch marker again.
Crocheting into the back loop only creates a turned out effect so each round going forward will build on top of each other nicely. (12 sts)
Step 4:
Make a sc in each st like normal. Replace the stitch marker, marking the very last st of this round. (12 sts)
Now is the time to secure the tail from the magic ring or slip knot we created at the beginning. This will be on the inside of our project so I find tying off the end with a simple knot and cutting off the extra length is all it needs to stay in place. Just make sure the base won’t come undone.
Step 6:
Make 11 sc, one into each stitch like we did last round. After completing st #11, create a dec using the next 2 sts available. Place your stitch marker on the second to last stitch you made in this round, st #11. (11 sts)
Now that we have decreased, the very last stitch we just created (the dec) essentially is stitch #12 AND stitch #1 of the next round. Each round going forward will now be 11 sts instead of 12. I find this helps the chap stick fit more snugly into the holder.
Remember, you may need to adjust the number of sts in your rounds depending on the type of yarn you are using, the hook size you are using, and the size of your lip balm.
Step 7:
For rounds 6-10, crochet 11 sc in each st. Be sure to remove the stitch marker, complete your last stitch and mark the last stitch of the round before moving on to the next. (11 sts)
Step 8:
Once the holder is at your desired height, it is time to attach the keychain ring and clip to it. To do this, we will make a tab of sc that folds backwards and fastens to the outside of the chap stick holder. The keychain ring will be secured within this tab to create a professional and polished look!
To make the tab of sc:
Ch 1 and turn.
Making 4 sc into the next 4 sts. (4sts)
Ch 1 and turn your work once again.
Create 4 scs into each st you just made before. (4sts)
After creating 4 scs, ch 1 another time and turn your work.
Repeat once more by making 4 more sc. (4sts)
Ch 1, leave at least 2 ft long of a tail, cut your working yarn, & fasten off.
Step 9:
Take your key ring and attach your clip to it if it is not already. Position the ring onto the tab of sc sts we made. Fold the tab backwards until the end of it meets the main part of the holder.
Thread your yarn needle with the 2ft tail you have left.
Fasten the sc tab to the outside of the chapstick holder by sewing. Poke through the back, to the inside of the holder and pull through. Poke the needle through the opposite direction, moving a bit to the left of the previous stitch you made, and pull the yarn all the way through.
Repeat this as many times as necessary until the tab is securely fastened to the main part of the holder, ensuring the key ring is being sandwiched inside the fold.
Step 10:
Once you are certain the tab has been fastened well enough, make a couple knots to secure your work, weave the end in a couple of times, and cut the yarn! The keyring should now be attached and your chapstick should fit inside perfectly!
Post a comment